- Create your Twitch stream widget here.
- Customize your Twitch stream widget.
- Copy the Twitch stream widget embed code.
- Login to your Webflow website admin panel and create or edit a page.
- Paste the embed code where you want the Twitch stream widget to appear.
- Save and view your page. Done!
That's easy! Embedding Twitch stream widget on your Webflow website will take only 2 minutes. If you need a more detailed guide, scroll down to follow our complete guide or watch our video guide.
Looking to purchase our premium features? Please check the details on our pricing page here.
Create and customize your Twitch stream widget
The first part is creating your Twitch stream widget using the SociableKIT dashboard. Customize the look and feel to match your brand. Follow the steps below.
-
Sign up FREE or login to SociableKIT. You can login here if you already have an account. Once you sign up, you will start your 7-day premium trial. After 7 days, you can activate the free plan if you don't need our premium features.

-
Select "Twitch stream" on the dropdown. SociableKIT offers several social media feeds widgets. You might need to search it using the highlighted area below. Once found, you can then select it.
-
Customize your feed. Click the "NEXT" button to show the customization options of your social feed. You can change the layout, colors, font, and more to match your brand. Click the Save changes button.
-
Copy the embed code. Click the "Embed on website" button on the upper right corner. Select your website builder. On the popup, copy the JavaScript embed code.
- Paste the embed code and save your Webflow website page. Please follow the second part below to add Twitch stream widget to your Webflow website.


Enter your Twitch username.


Add Twitch stream widget to your Webflow website
The second part is adding your Twitch stream widget to your Webflow website. After you customize your Twitch stream widget and copied the embed code, it is time to add it to your Webflow website. Follow the steps below.
- Copy your free Twitch stream widget embed code. Make sure you followed the first part above. It detailed how to you can create and customize your widget to get your free embed code.
- Login to Webflow.
- On your existing website, click the "Page: ...." in the upper left corner then click the "Create new page" icon.
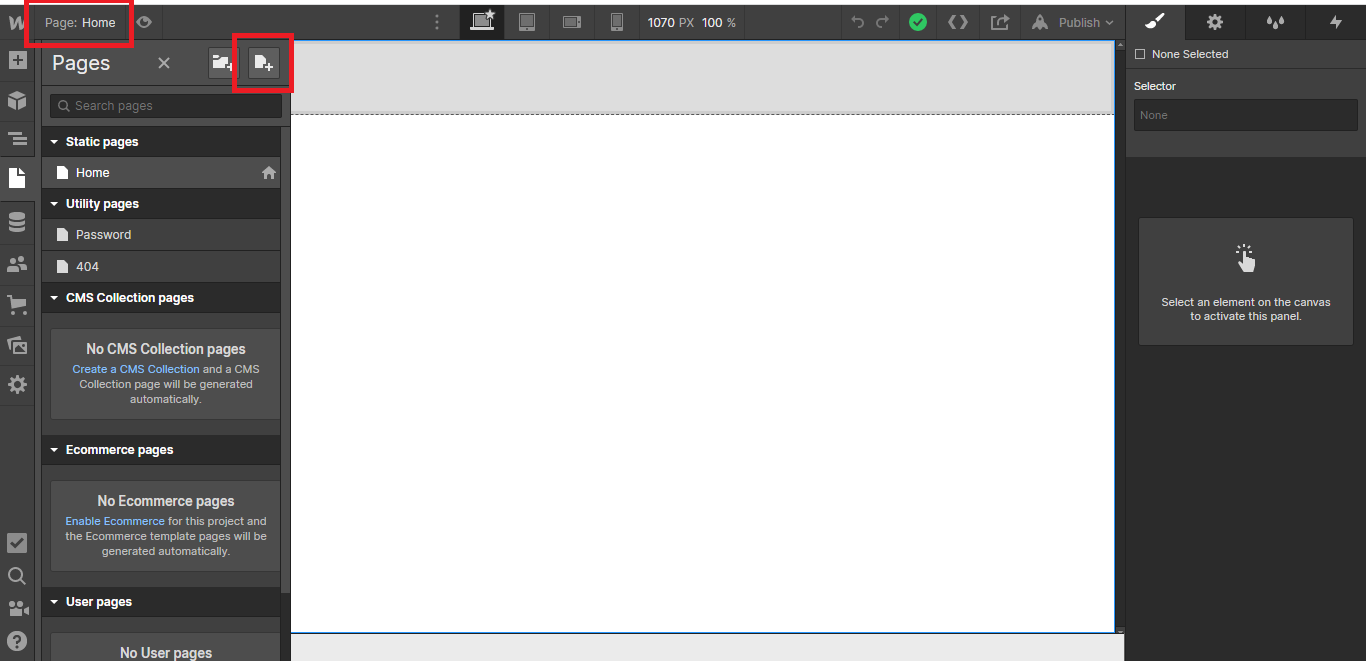
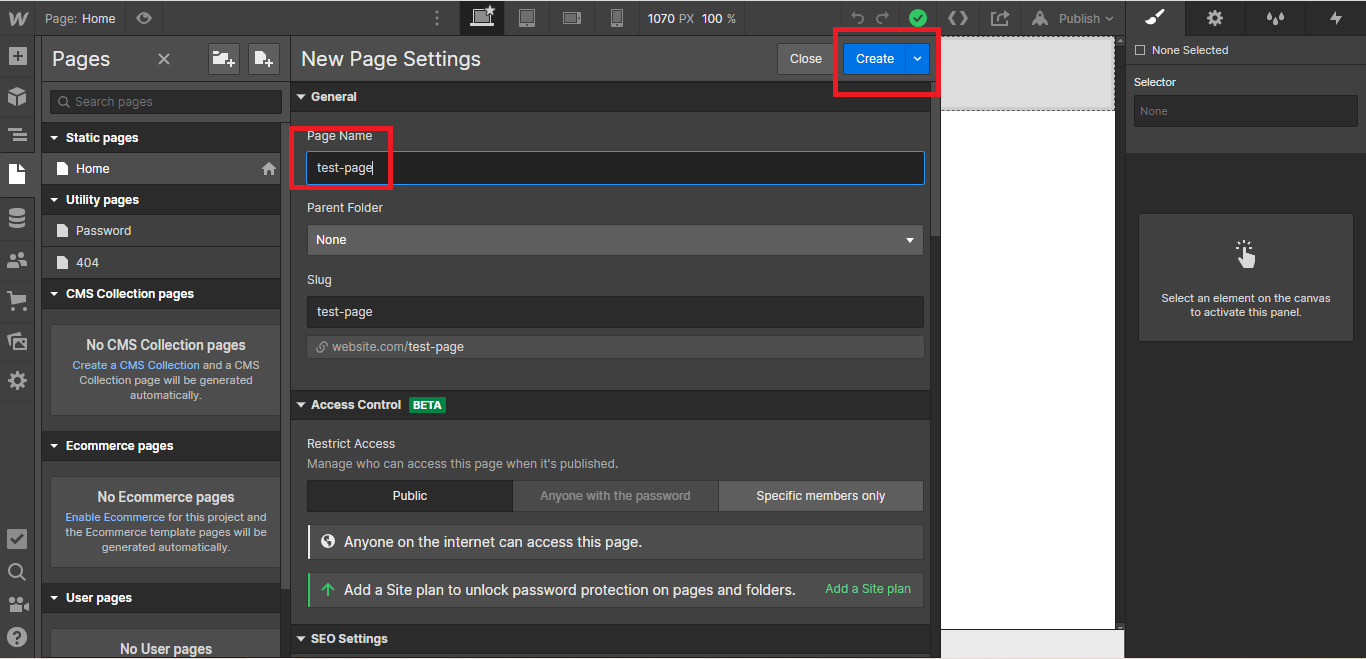
- Once done add a name for your new page then click "Save".
- On the left, click "Add Element". Drag "Embed" to your page.
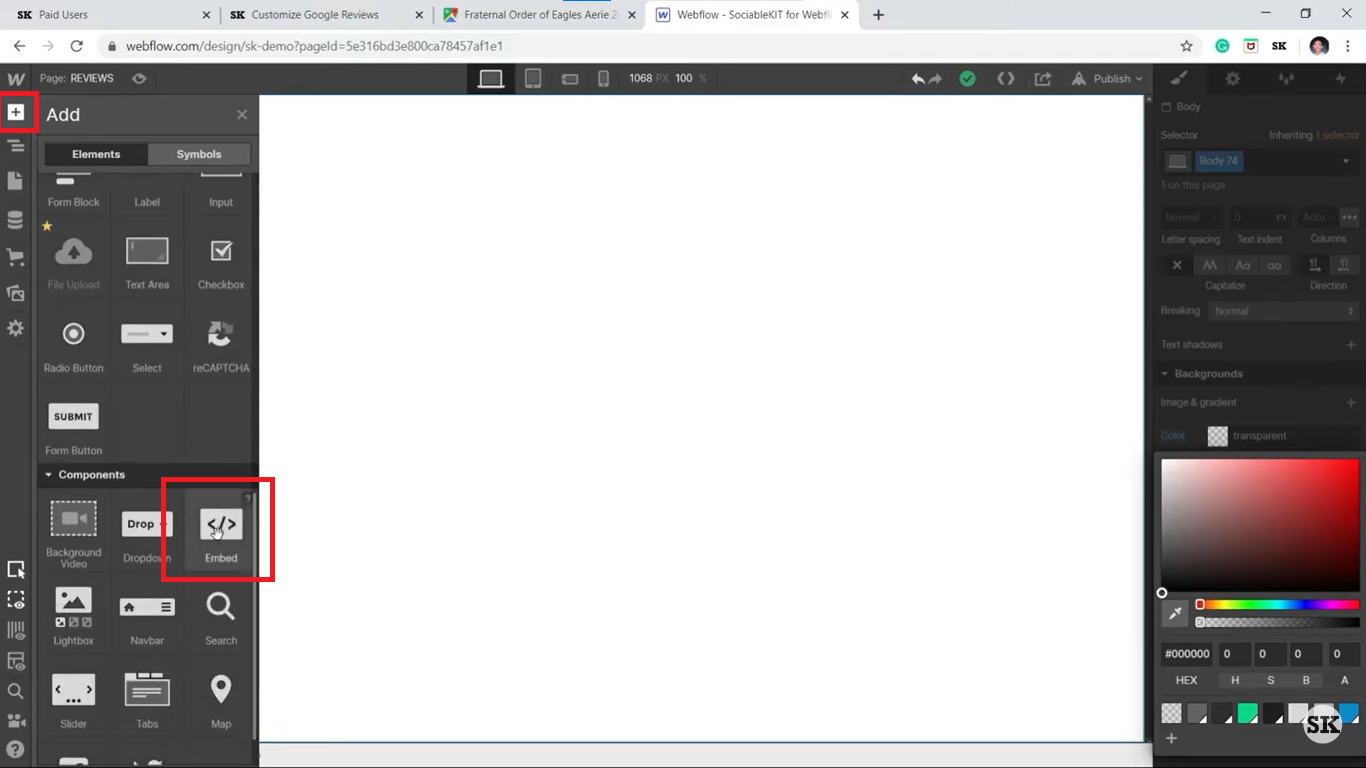
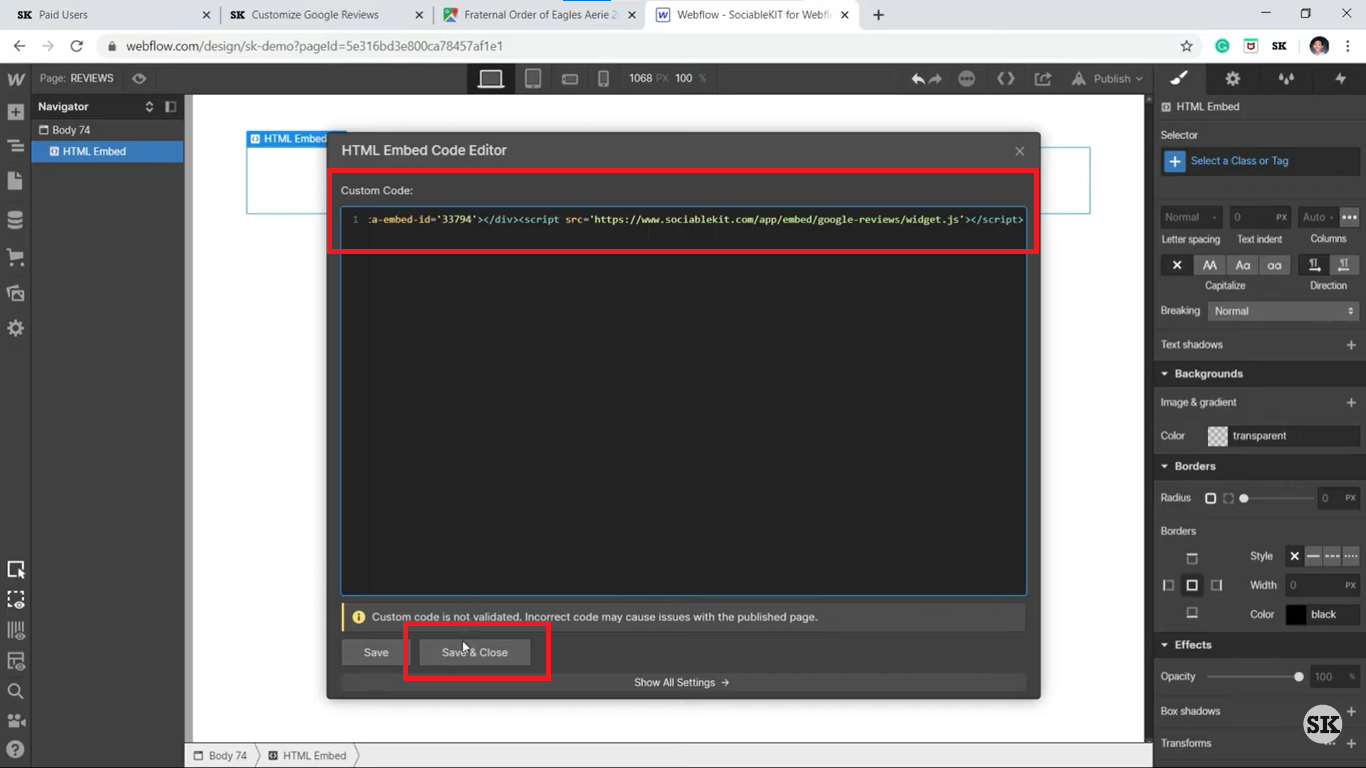
- Paste the JavaScript code you copied from SociableKIT.
- On the upper right, click "Publish" > "Publish to Selected Domains".

- View your page. Done!


"It actually works, is very easy to implement, super powerful, looks great, and the price is right."

Coby Gifford
"I've been a customer of SociableKit since their beginning. Their unique products are second to none. Their customer service is top notch- prompt, courteous, and knowledgeable. I highly recommend them!"

Jen Gray
"A fantastic set of plugins that truly helps navigate the ever changing world of social media and keeping our various platforms connected. The support team is fantastic and they have really been responsive to our needs."

Village of Bensenville
"An amazing set of plug-in solutions for a large number of social media web site integrations. I would lie if I said I've tried them all, but the ones I'm using are just stellar. The support is also superb. Not only are they helping you with all the little problems you might encounter, but they also listen to requests for new features. Requested features are then - more often than not - swiftly implemented. I wish all companies had support like theirs. I really can't recommend Sociablekit enough! 👍"

Johnny Strömbäck
"Great features! Very responsive support, and amazing quick turn around on enhancement request."

Crystal Davis-Gibbs
"Amazing customer service! I really love how quick the widget works. It looks beautiful! Glad I was able to find it."

Christa Stephens
"Super easy to set up and integrated seamlessly with my website."

Katie Rodgers
"This was a great way to easily embed Google Reviews into my client's Wix site. I had trouble at first because the business has no physical address listed, but the support team helped me out and everything is running smoothly so far. I recommend!"

Kristen Williams
"I have to hand it to a company that goes above and beyond with their customer service... your team is a notch above anything I've experienced. Great software, great support - what else can you ask for?"

Yannick Picard
LIMITED TIME OFFER!
Sign up now to use our widgets for FREE FOREVER!
No credit card required. Cancel anytime.

We hope that this article has been helpful in showing you how to embed Twitch stream on Webflow. By using our free website widgets, you'll be able to make your website even more engaging and interactive. Twitch streaming is a fantastic way to connect with your audience, grow your brand, and have fun doing it. So, what are you waiting for? Give it a try today and see the difference it makes!

Mike
Co-founder, SociableKIT
Hi! I'm Mike, the Co-founder of SociableKIT, a platform that helps website owners add beautiful and reliable social media feeds to their websites. Need support?
Contact our team on this page.
I'm also passionate about technology and enjoy sharing my experience and learnings online. Connect with me on Twitter, LinkedIn, Facebook, and Instagram.
365 Days of Social Media Content Ideas: Your Complete Guide to Engaging Posts
This comprehensive resource is filled with engaging and interactive post ideas to keep your social media feeds vibrant all year round.
No more stress about what to post next or how to engage your followers – we've got you covered!
Start your journey towards an enhanced online presence today! Please enter your name and email below, and this invaluable tool will be on its way to your inbox.

Need Support?
If you need help, feel free to chat with us in the live chat box on the lower right corner of this page. You may also use the chat box located here.
You may also email us at [email protected]
We’re happy to talk about how to add social media feeds to your website!